Overview
SAML is an authentication method that allows for Identity Providers (You) and Service Providers (VitalSource) to securely exchange data.
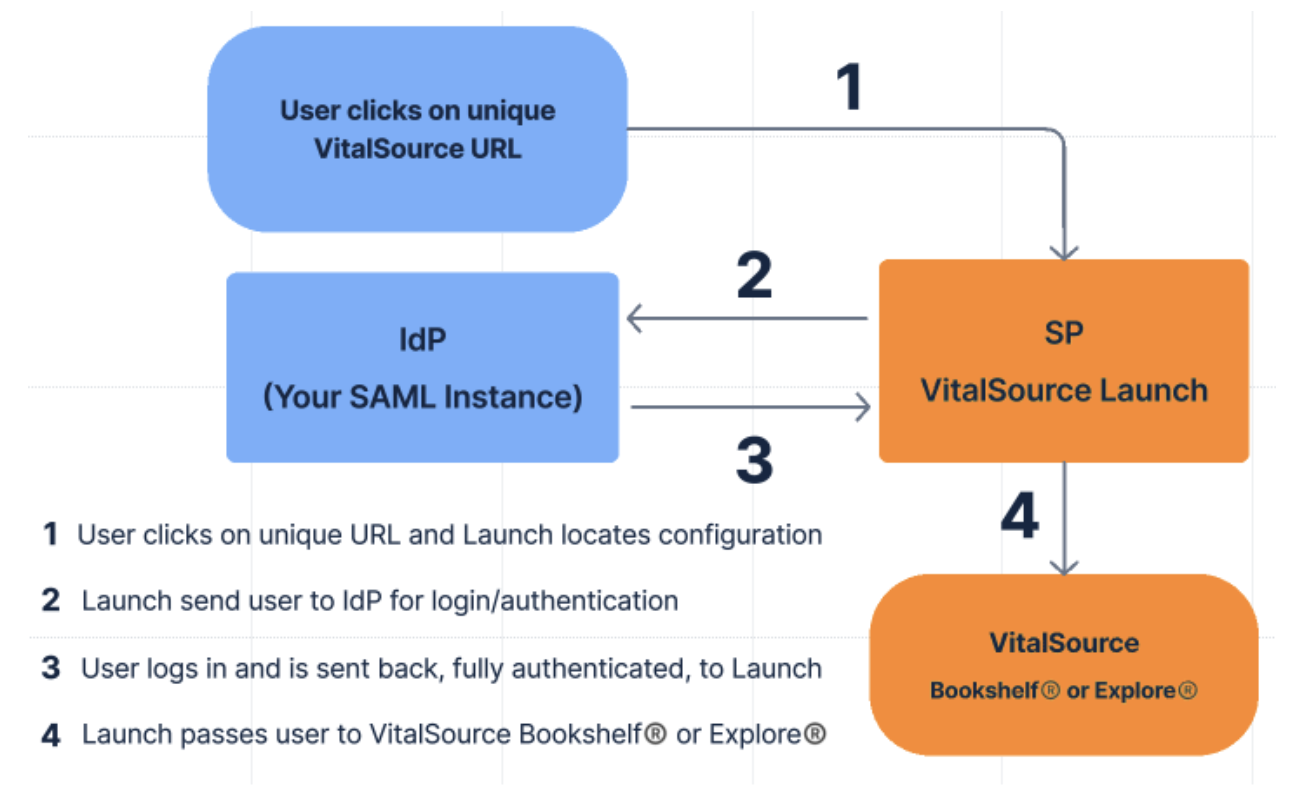
VitalSource supports the (SP) initiated workflow.
Identity Provider (IdP) - This is your SAML instance. It is where your users will login to authenticate. Some common IdP systems are Shibboleth, Google, Open Athens and Azure, but there are many others.
Service Provider (SP) - VitalSource Launch is the SAML SP for this integration.
SAML Setup Instructions
Every SAML instance is a little different, but here are a few things they all have in common that you will want to have configure.
Step 1: Ensure the setup is configured for "persistent" users.
This will ensure that the student gets to the same account each time and is only provisioned content one time.
Example:<md:NameIDFormat>urn:oasis:names:tc:SAML:2.0:nameid-format:persistent</md:NameIDFormat>
Step 2: Add the link to VitalSource’s metadata file to your configuration:
https://bc.vitalsource.com/federation/saml_auth/authentications/metadata
Common setup values:
Assertion Consumer Service (ACS)/Reply URL: https://bc.vitalsource.com/federation/saml_auth/authentications
Identifier/Entity ID:
https://bc.vitalsource.com/federation/saml_auth/authentications/metadata
- Step 3: Send VitalSource the below required information about your SAML instance
The type of SAML IdP being used
Your SAML IDP METADATA URL (It will end in .xml) If you do not have a hosted URL, please send the XML file itself. Ensure you select to export your unique certificate value rather than using a generic value.
A time-limited IdP STUDENT test account login/password.
The attributes we will need to receive includes:
a unique identifier - To ensure that users have a consistent user account between SSO from your IdP and our existing LTI-based integration, it’s important that we have a SAML attribute available that aligns with the data we receive from your LMS. We find this varies by campus, so we’ll need your help identifying the best attribute to use here.
mail – This allows us to handle scenarios where a user may have an existing account record in our system using their school email address
eduPersonAffiliation – We use this to distinguish between faculty members and students or other staff
givenName – optional, we use this to personalize the user experience
sn – optional, we use this to personalize the user experience
- Step 4: Add a unique VitalSource URL to your system
Once the configuration is in place, VitalSource will test the configuration and provide you with a unique link to access the content. When users login to your SAML system and click on the link, they will be able to access their materials.